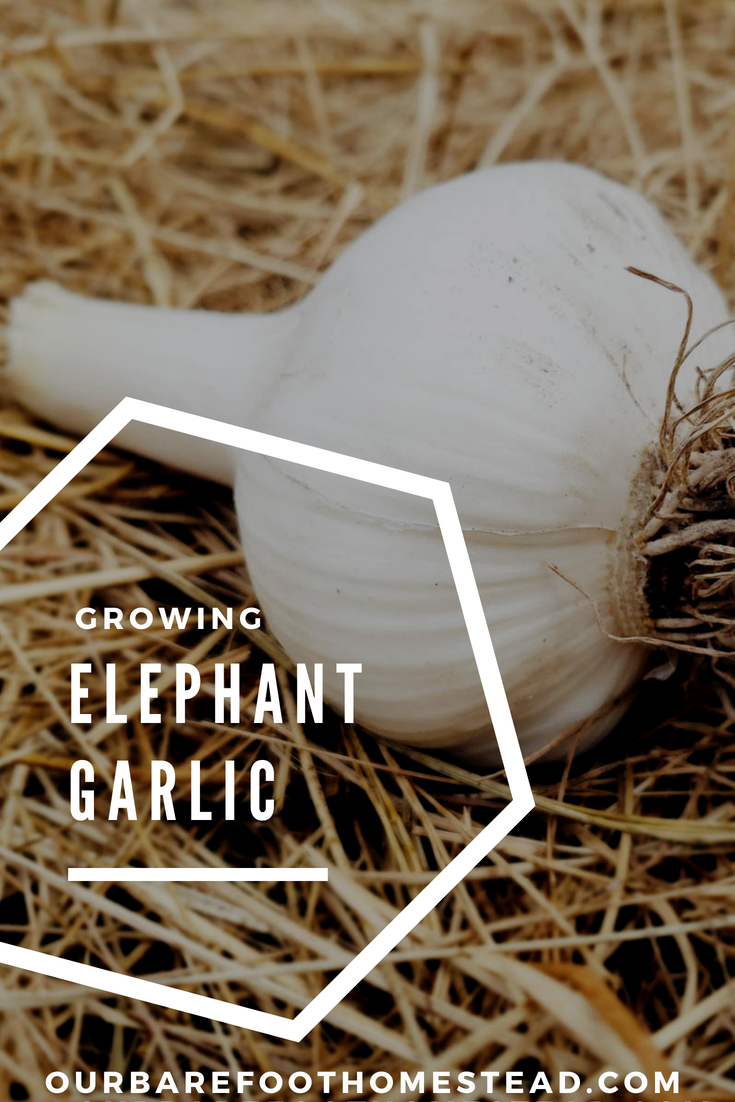
Our biggest investment of time and resources in our garden is definitely our elephant garlic. It’s a niche item that Bob learned to grow while working on a small farm as a teenager. Today, we cultivate about 1/2 an acre of it. It’s the perfect blend of simple and unique.
Elephant garlic is more closely related to a leek than to your traditional hardneck or softneck garlic. It has a mild, sweet flavor. Consider how a sweet, vidalia onion compares to a yellow onion and you’ll get the idea of how elephant garlic compares to other garlics. It can grow to the size of a softball and keeps for 6 months or longer in a cool, dry place. But it is a little finicky.
Elephant garlic is hard to grow commercially because it doesn’t respond well to mechanical harvesting. It bruises easily and needs to be harvested, cured, and cleaned very carefully.
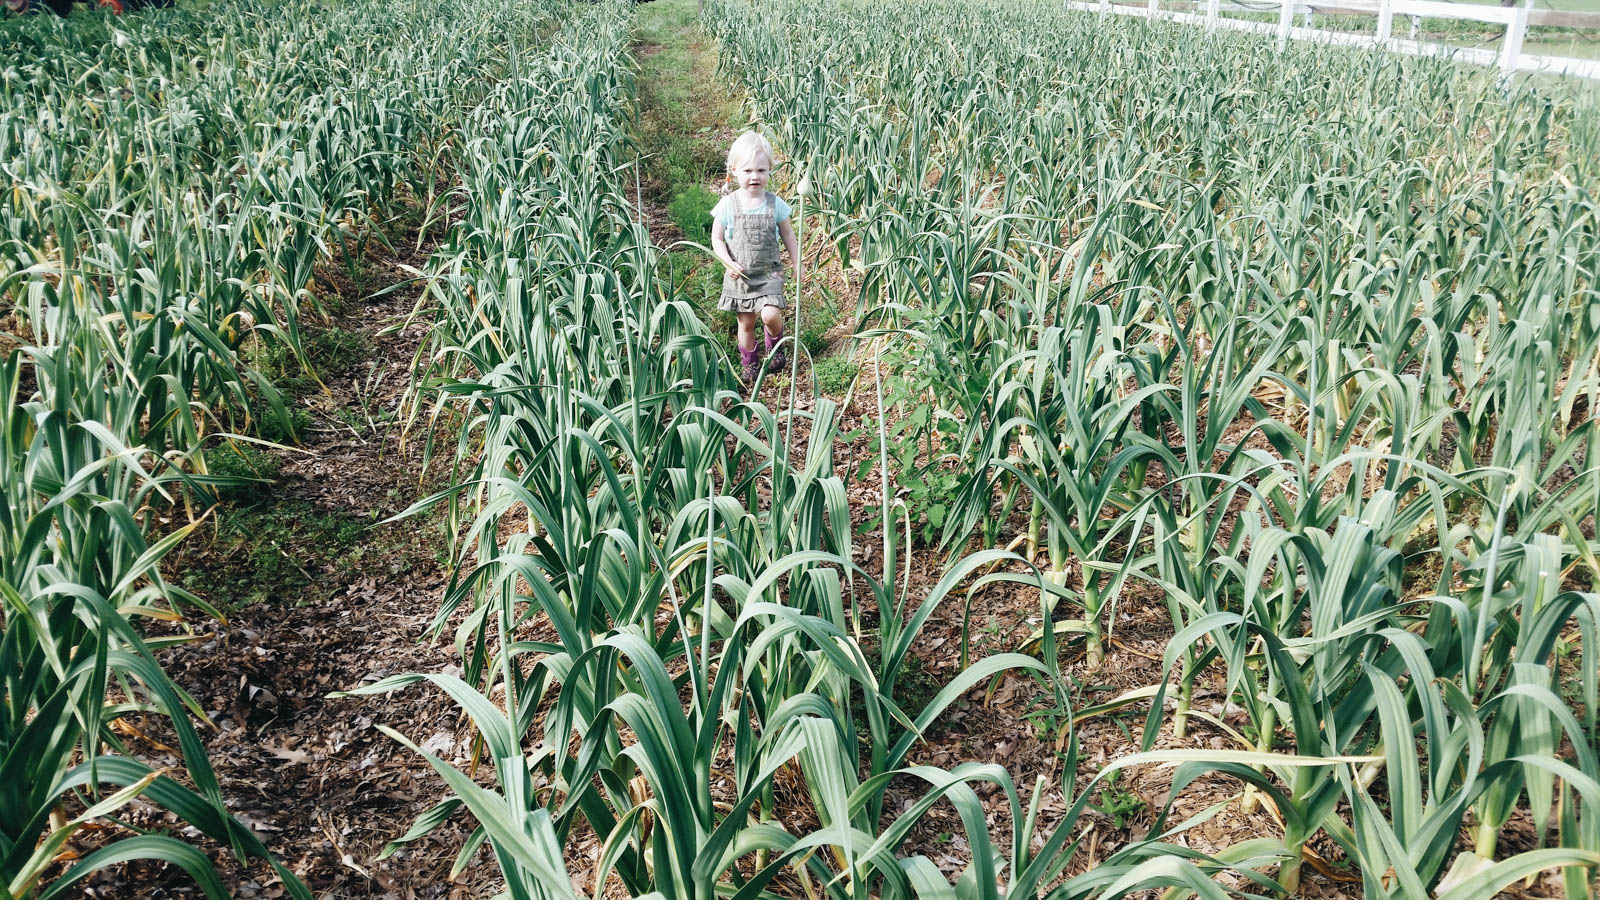
We plant our garlic each fall around the end of October. Throughout the winter, we keep it mulched and fertilized (with organic fertilizer) as it slowly grows underground. In the spring, growing really ramps up. We snap off the scapes when they appear in order to focus the plant’s energy on growing its root. As the sun and rain come, so do growth spurts and sometimes even rot. It’s hard to grow this variety of garlic on the East Coast because of how sensitive it is to the wet springs we have.
We watch our crop carefully, checking on it almost daily as the top leaves begin to yellow and die. We dig a bulb here and there, checking for moisture levels and size. Then, one day, Bob calls it: It’s time to dig.
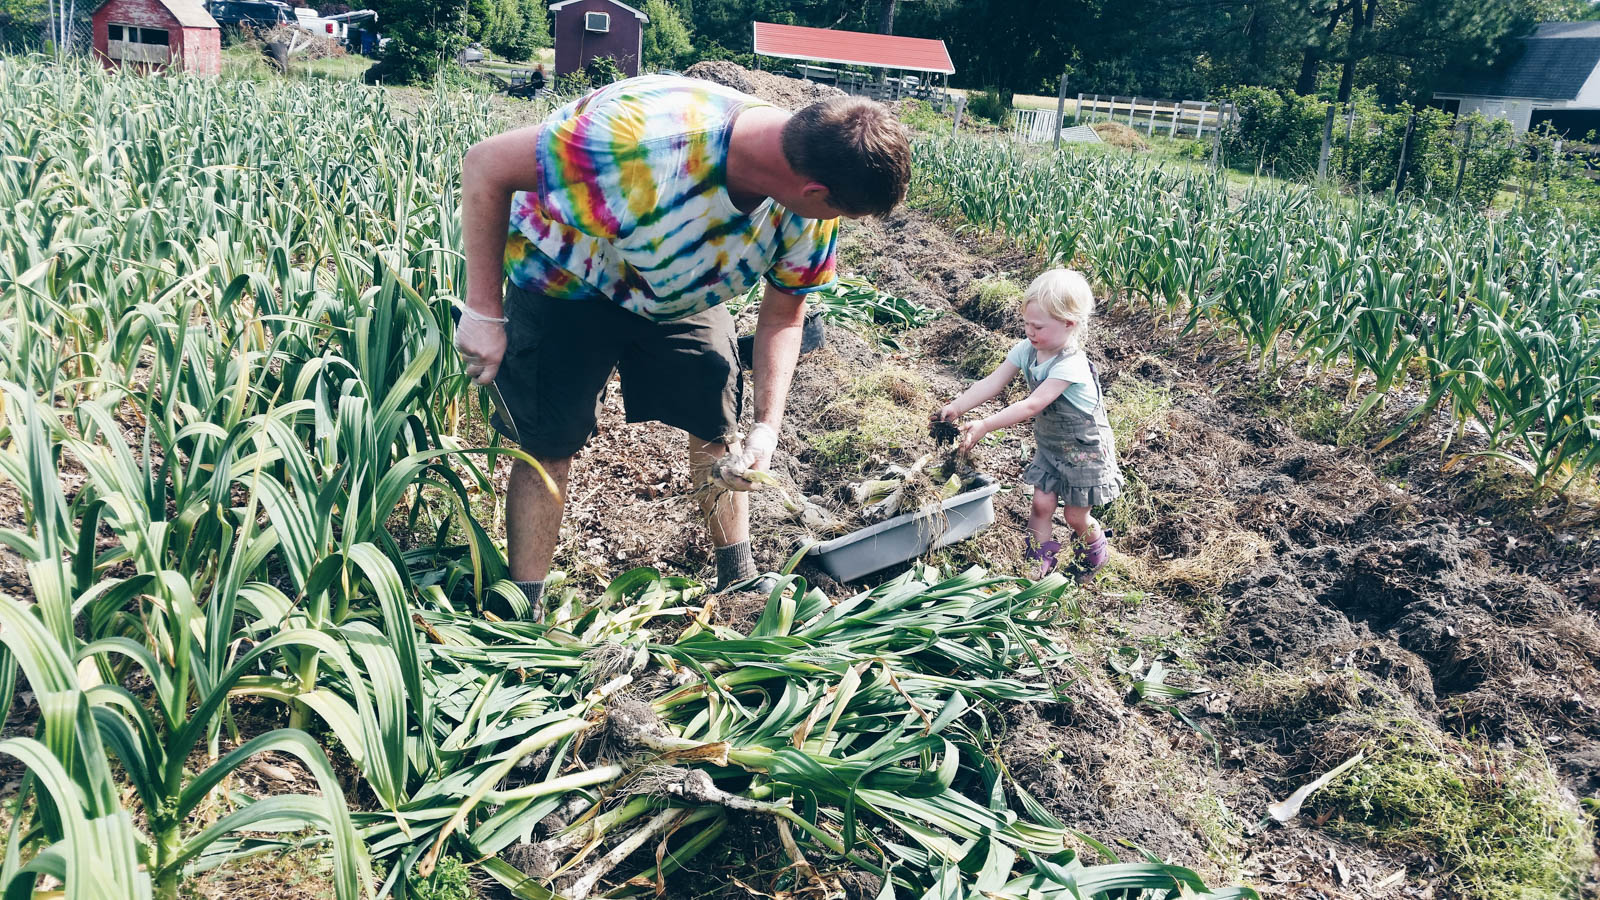
With a few good farm hands that we hire for a day or two, we dig up all the garlic and cut the stalks, loading it into bins, and eventually stacking it carefully on drying racks. At this point, the labor is almost complete, but we’re still always waiting on pins and needles for the rest of the process. The garlic needs 2-3 weeks to cure. We stack our racks carefully to allow to adequate airflow and ensure plenty of air with several fans to fight the muggy Virginia spring weather.
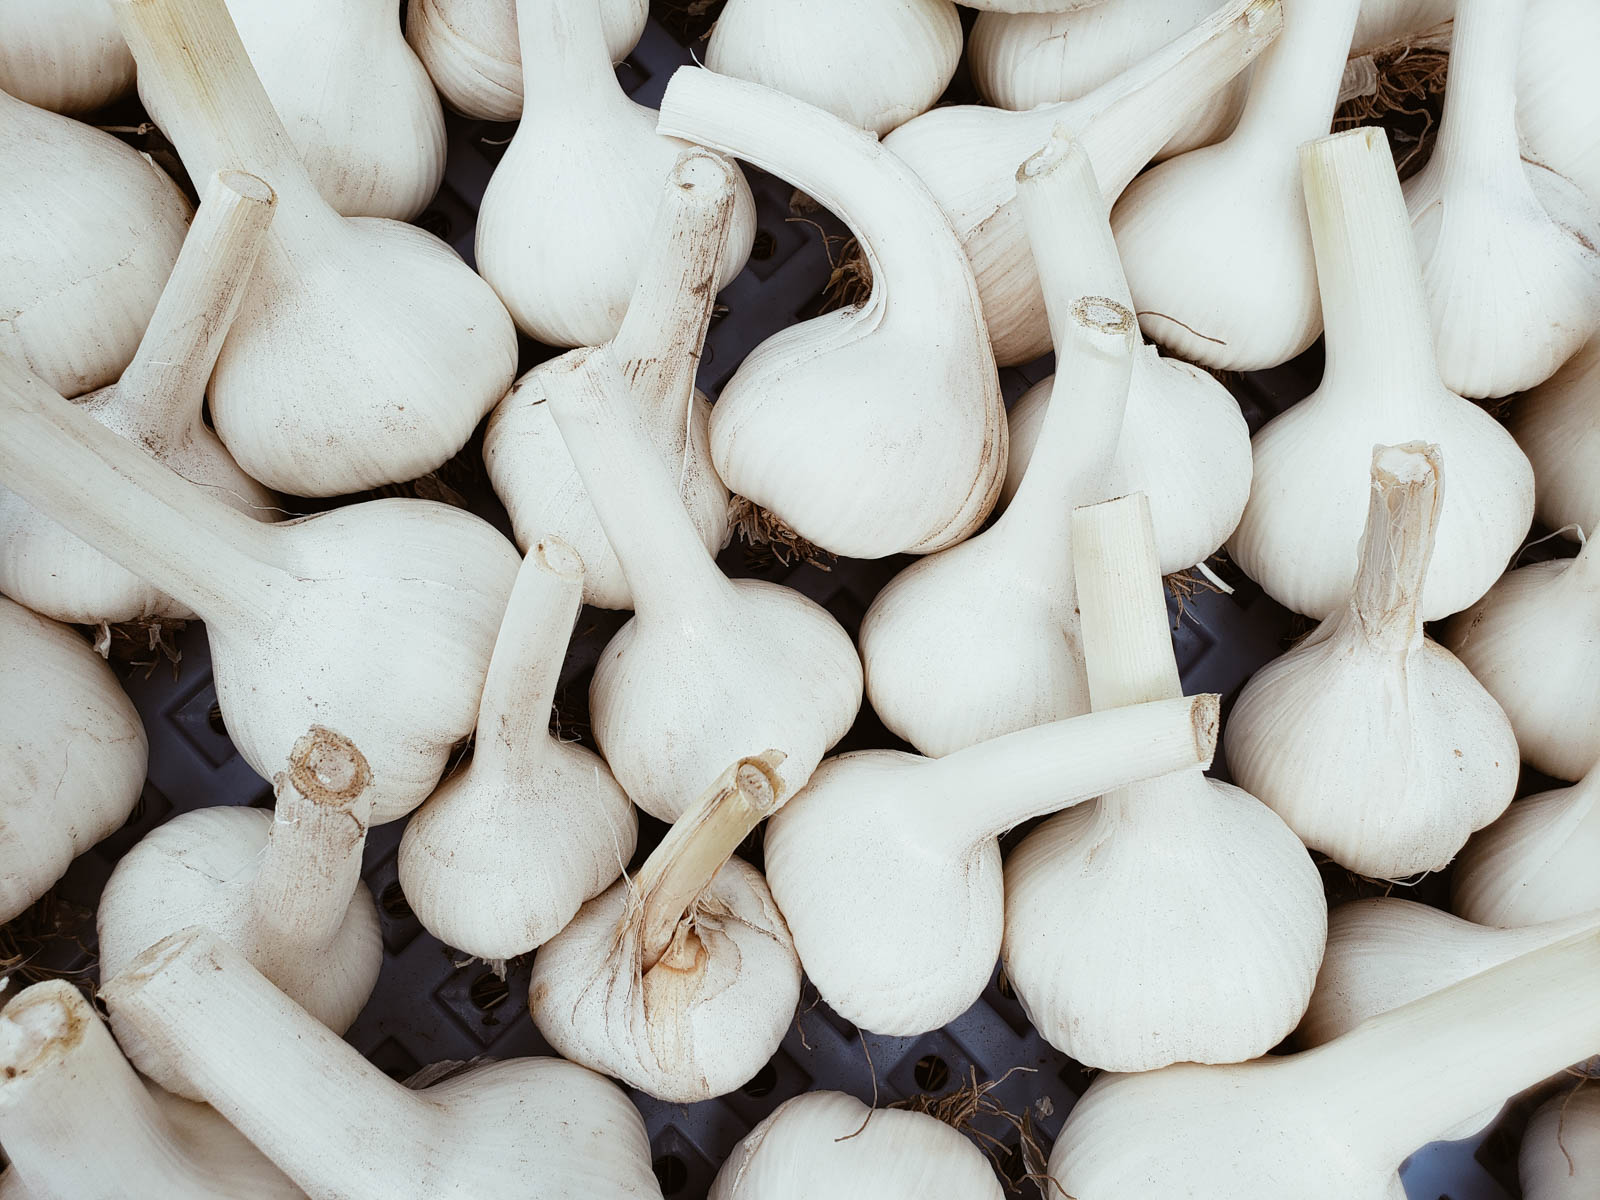
As the garlic dries, we clean it by hand–piece by piece. Removing the outermost layer of skin, trimming the roots, and cutting the stems closer. Finally, the garlic is ready to sell. It’s been a long process, but a beautiful one. We can see the fruit of our labor in each weighed and measured bag or box of garlic that we send off to restaurants, farmers markets, and farm stands. We’re proud of our garlic!

Come July, we will start planning for next year, deciding how much seed we need and preparing the soil for another crop. In October, we will plant and start the process all over again.